The New Plan
 |
Thunder Mesa Mining Co. v.7 (at least). Everything fits! To see the plan full size: right click> Open in new tab.
|
It may seem strange to still be working on the final track plan nearly 3 1/2 years into construction but Thunder Mesa is a tale that has grown in the telling. What started out as a simple 3' x 6' display has now grown to occupy more than half of my art studio. It's about 15' x 9' now, or will be when complete, and this latest plan manages to fit in just about everything I want. At least for now. All I can say is that it's a good thing I enjoy drawing track plans since I have
drawn and redrawn the working plan for Thunder Mesa more times than I care to remember. This time, my decision to build a
portable On18 Calico layout that "plugs-in" to the larger layout when not on the road has lead to some major revisions and improvements.
Previous changes to the layout plan came when adding
Verne Niner's San Lorenzo diorama back in October of last year. The plan I created then had a lot going for it, but I was never quite satisfied with its presentation of Calico or the existence of the high-line branch that didn't really connect to anything. Also, the 30" aisle width was a little tighter than I'd like and there was more hidden track than I'm comfortable with.
The new plan addresses these issues while also adding a couple of new scenes to the mix and fixing some sightline problems. The central aisle broadens out to a more comfortable 36" and the previously hidden track along the back is brought mostly out into the open. The rear track now rises and falls on a 3% grade to add visual interest and to ease the junction with the branchline up to Big Thunder Camp. The new On18 Calico layout occupies the left side wall and acts as a separate feeder line.
 |
Zooming in: The portable 2' x 5' On18 Calico mini-layout sits on top of the Coyote Canyon section with a base track elevation of 60" above the floor. Ore is delivered from Calico to the TMMC via a large tipple above the canyon. Passengers will need to take the stairs.
|
With Calico moving to the left end of the layout, nearly everything else along the back wall has shifted to the right. Moving the sleepy border village of San Lorenzo all the way over to its own 30" wide peninsula on the far right opened up room for a larger Coyote Canyon with longer, more dramatic bridges, while also making more space for the Balancing Rocks section - now called "Devil's Garden." I also found room for another small settlement called "Hanging Rock," future home to the Olson Mine and Furlow's store. Between Devil's Garden and Hanging Rock is a narrow, serpentine slot canyon. Slot canyons are amazing natural features of desert the Southwest and something I've long wanted to model on the TMMC. Both canyons on this side of the layout will be very deep, with scenery extending nearly to the floor.
 |
Next comes the Devil's Garden/Hanging Rock section with its deep slot canyon. Here the branchline begins its steep ascent up a 6% grade to Big Thunder Camp. Only short ore trains will be making this trip. The standing rocks in Devil's Garden will be animated to sway and move as the trains pass. Furlow's Store and the Olson Mine are about all there is to the settlement of Hanging Rock.
|
The branchline up to Big Thunder Camp is short and very steep, with a ruling grade of 6%. Only short ore trains will make the trip up the grade and the new run-around track at Big Thunder Camp should make it easier to switch the mine there before backing down the hill. Another improvement is placing the Natural Bridge on the branchline. It means the bridge can be higher and more dramatic while also creating interesting sight-lines from both sides of the peninsula.
 |
The San Lorenzo section includes a small engine terminal and views through Natural Bridge toward Calico. This section will be the new home for Verne Niner's award winning San Lorenzo diorama where an adobe depot and Indian pueblos on the mesa above will complement the scene. San Lorenzo will also be home to an interchange with Verne's Estrella & Sonora Grande Ry and will act as one end of the line in operations.
|
 |
Last, but not least, we come to the original Thunder Mesa section. The only real change here is the addition of Big Thunder Camp and its runaround track. The track through Rainbow Caverns has also been straightened out a bit and realigned in a broader 18" radius curve. Visually, Big Thunder Mine will loom high above town providing a counterpoint to Baxter's Butte. By the way, this is by far the most accurate rendering of Thunder Mesa I have done to date.
|
Operations
As I've stated before, I'm not really much of an operations guy. My main enjoyment in the hobby comes from building models, planning scenes, and watching little trains roll through big scenery. This plan, and really the entire concept for Thunder Mesa, caters to those interests. For all of its bells and whistles, this plan is really just a basic folded dog-bone with a branchline. It doesn't really go anywhere and trains just loop around to right back where they started. However, there
is a way to operate the layout in a more realistic point to point fashion if desired.
If we consider Thunder Mesa as one end of the line and San Lorenzo as the other end, suddenly the layout is transformed from a roundy-roundy caboose chaser into some semblance of a miniature transportation system. All it takes is a little imagination, some careful planning, and a willingness to share the passing siding and turntable between the two endpoints. It's an old John Armstrong trick. In operations, the turntable and passing siding at Thunder Mesa is also the turntable and passing siding at San Lorenzo.
Imagine that rather than just down the aisle from each other, Thunder Mesa and San Lorenzo are really many miles apart, just as they would be in the real world. Imagine also that they each have similar track arrangements, with a passing track, turntable, and interchange siding. Since the TMMC is a small railroad with a laid back and uncomplicated operating scheme it is actually possible to get away with using one end for both ends. The advantage, of course, is that the entire remainder of the railroad lies "in between" these points.
 |
In this simplified overview sketch of Thunder Mesa Country, the possible point-to-point operations become more apparent. Thunder Mesa and San Lorenzo share some - but not all - of the track at each "end" of the line. The timing of trains, as well as which tracks can be used at each end, would need to clearly defined for an effective operating session to take place.
|
I would run three trains a day in each direction with this scheme. Train #1, the Ore Train leaves Thunder Mesa first and ascends the branchline to Big Thunder Camp. It never goes to San Lorenzo. Meanwhile, train #2, the Daily Mixed, and train #3, the Excursion Special, follow behind on the "hour." Train #1 waits at Big Thunder as trains #2 and #3 pass the junction to San Lorenzo. Train #2 switches and turns at San Lorenzo before train #3 arrives. The Ore Train then backs downgrade all the way to Thunder Mesa as the Daily Mixed departs San Lorenzo. The Excursion Train then turns at San Lorenzo and heads back to Thunder Mesa. Clear as mud, right?
Take a Ride on the TMMC
Let's take a ride on a typical daily mixed train from Thunder Mesa to San Lorenzo. This would be train #2 on the schedule, departing Thunder Mesa Depot about an hour after train #1, the morning ore train bound for Big Thunder Camp.
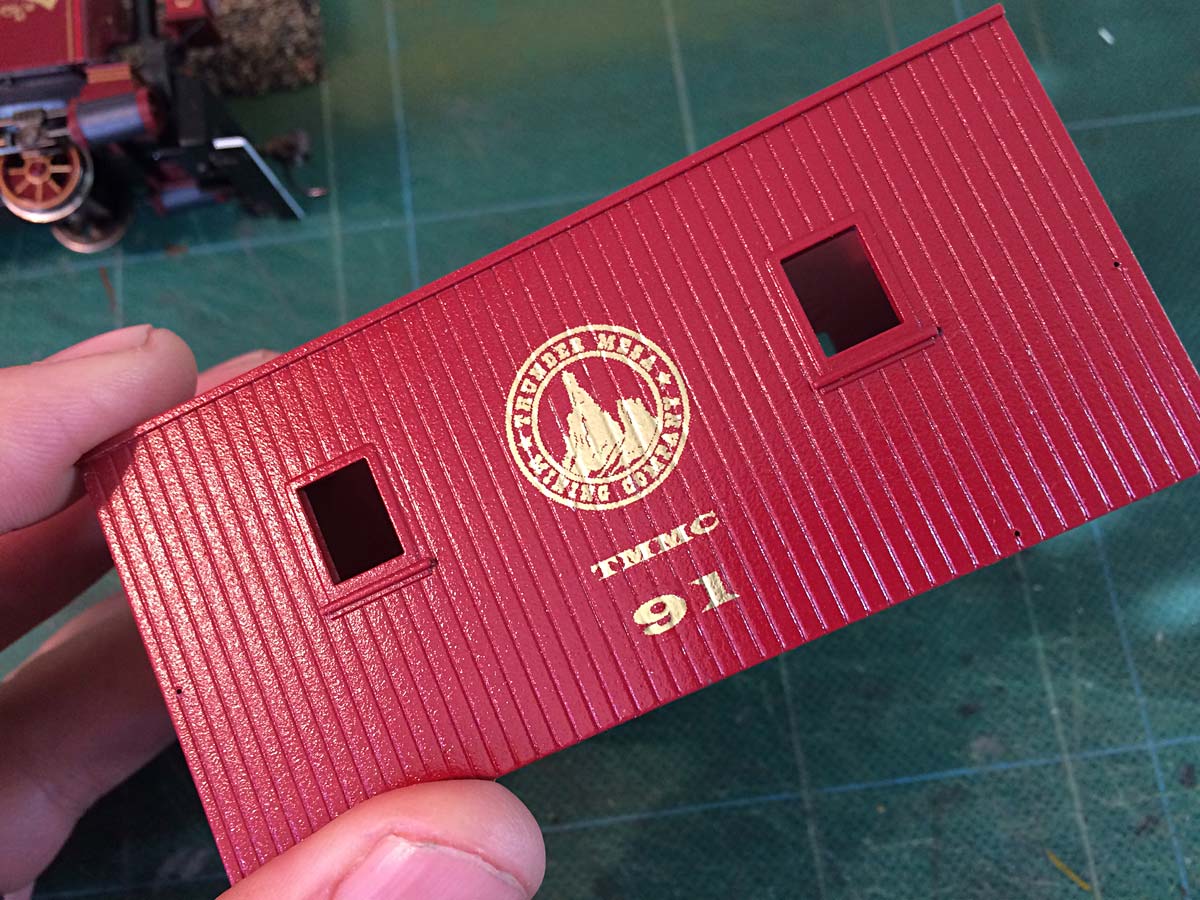
The conductor cries, "All aboard!" as we climb the steps and find an empty seat in bright yellow combine #101. The combine is coupled at the rear of the train and will also act as caboose and express car for our journey to San Lorenzo. Two loud blasts on the whistle and the engineer eases the narrow gauge 4-4-0, Earl Vilmer, forward out of the depot siding and on to the mainline. The slack is barely out of the couplers when our train crosses Big Thunder Creek on a wooden trestle. We can hear the roar of the falls echoing back in the narrow canyon as we pass. A moment later and we are steaming through the Cactus Forest before passing below McKennon Arch, gateway to the living desert.
Brakes squeal as we slow for Geyser Gulch trestle. Down below, the turquoise water bubbles and steams as the largest of the geysers, Old Unfaithful, gets ready to erupt again. The geyser is unpredictable, but it must be our lucky day since Old Unfaithful sends a spectacular plume of steam and spray skyward just as our coach rounds the bend at Ambush Rock.
Next comes famous Dinosaur Gap where construction of the right-of-way in the 1870s revealed the fossilized bones of an ancient creature. The toothy skeleton is remarkably well preserved but we barley have time to admire it before plunging into the darkness of Rainbow Caverns. It takes a moment or two for our eyes to adjust and when they do we are treated to an amazing spectacle of technicolor wonders. Stalactites, stalagmites and other underground formations seem to glow with unearthly light as waterfalls and fountains stream by in all the colors of the rainbow. Beyond, giant crystals fill mammoth chambers where living rock has been sculpted by centuries of flowing water into taffy-like confections.
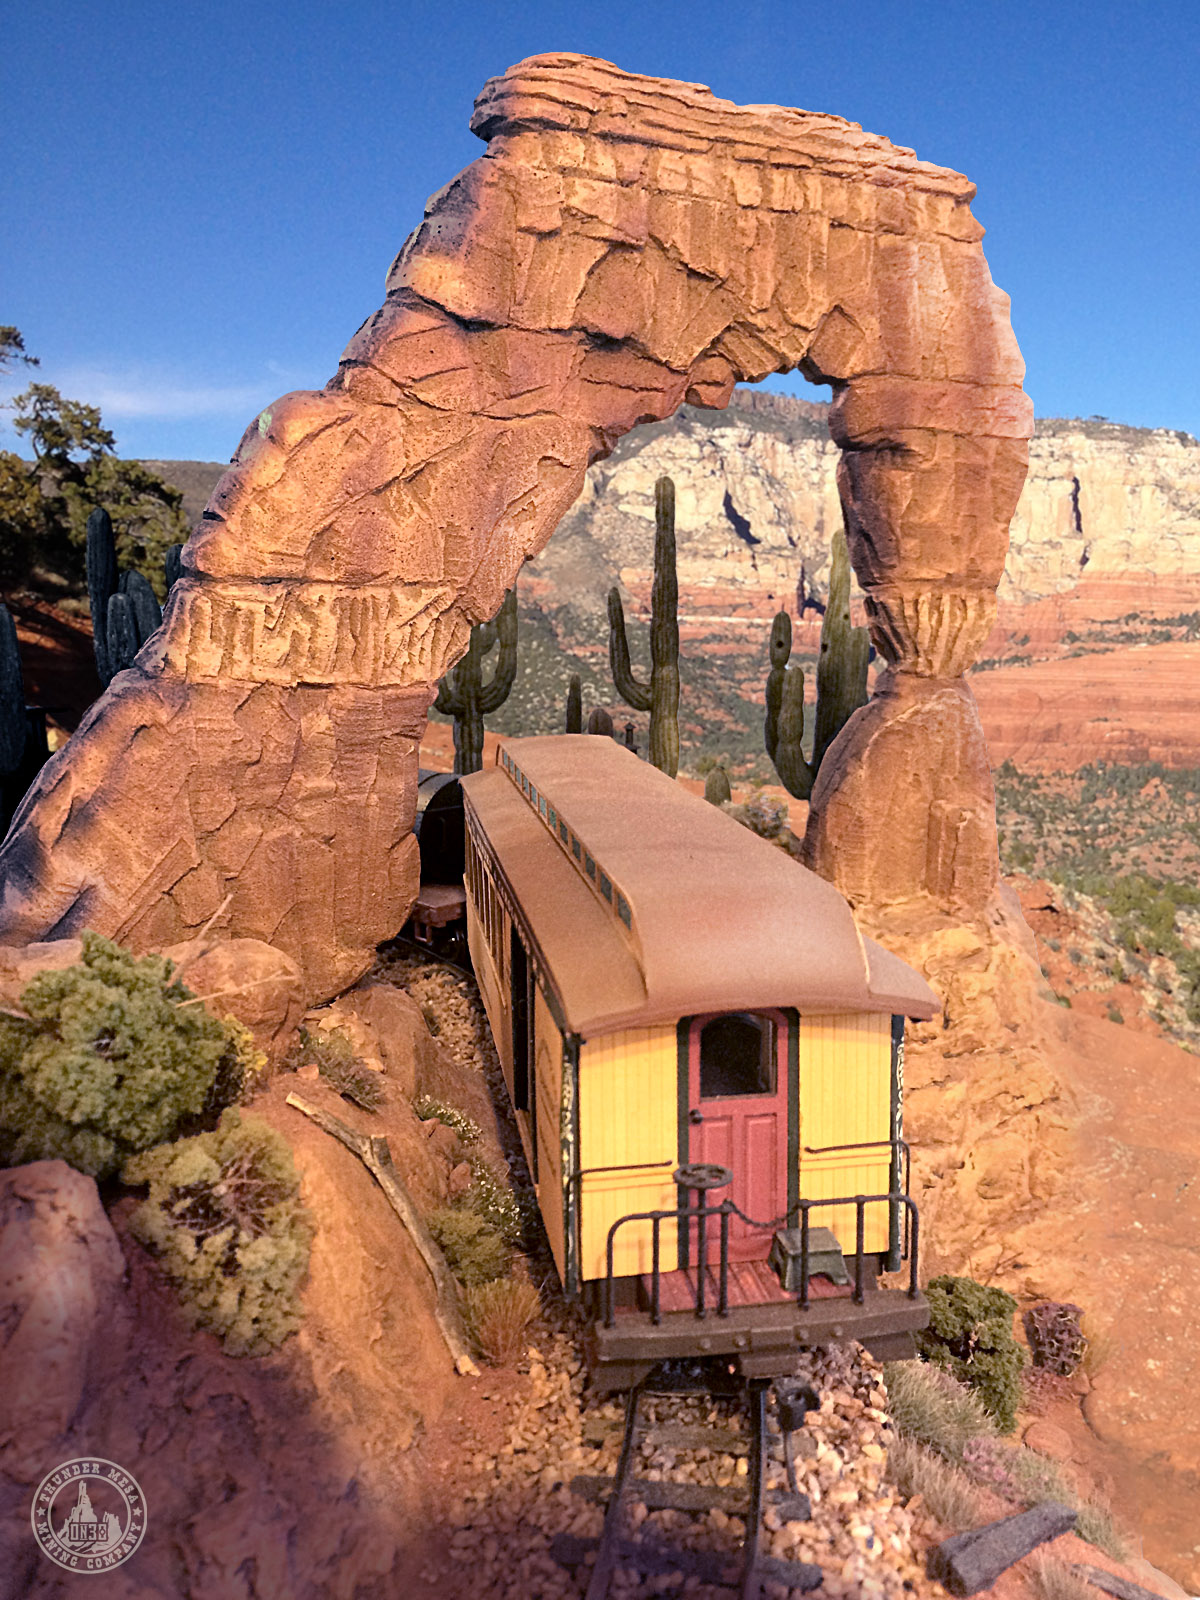
Emerging from Rainbow Caverns and back into the brilliant light of day we pass below Natural Bridge and on through the whistle-stop hamlet of Hanging Rock. Home to Furlow's Store and Olson's Mine, Hanging Rock is a well known haunt for outlaws and ne'er-do-wells so we won't be lingering there today. Crossing a bridge over what appears to be a nearly bottomless slot canyon, we enter Devil's Garden. Here, the standing rocks and hoodoo formations move and sway as our train passes, leaving the feeling we may be crushed at any moment. Relief comes soon however, as the great expanse of Coyote Canyon opens up before us.
Our train slows as we venture across the longest and highest bridge on the Thunder Mesa line. The river seems miles below as we ease across the arched iron bridge and chuff to a stop on the far side. A large ore tipple looms on our right and a small wooden platform is on the left. This is the stop for Calico, legendary gold camp located high on the cliffs above.
A gambler and his lady companion get off at Calico as the conductor checks his pocket watch. He knows that train #3, the Excursion Special, is just now departing Thunder Mesa with a load of curious tourists. Train #3 follows along about an hour behind the Daily Mixed.
Two more blasts of the whistle and we are underway again, entering a long tunnel below Calico Mountain. We emerge at upper Coyote Canyon and soon pass the junction for the branchline up to Big Thunder Camp. Train #1, the morning ore train, took the switch at the junction about an hour before and has already climbed the steep grade up to Big Thunder to work the mines. Our route takes us downgrade, across a narrow canyon and into another tunnel. Before plunging again into darkness, we can see the whitewashed adobe walls of a pueblo Indian village high on the mesa above.
Maybe we dozed off from the gentle rocking of the coach, but just a few moments later it seams, and we arrive in the sleepy border village of San Lorenzo. The Spanish influence is very apparent here as our train backs slowly into the depot siding. The fireman sounds the bell until a single short toot of the whistle indicates full stop. We gather our things and disembark. It will be awhile until our connecting stage arrives so we've got some time to explore the village.
With some warm tortillas and a plate of beens from La Frontera Cantina, we sit in the shade on the depot platform to enjoy lunch and do a little train watching. The Daily Mixed has left the depot now and the crews are just finishing up a couple of switching moves, swapping head for tail with the combine and dropping two boxcars at the E&SG interchange. Meanwhile, across the tracks, a trio of local banditos are cursing a fat pig that has chosen to cool off in the village fountain. The bells of San Lorenzo Mission chime the hour as the locomotive, Earl Vilmer, takes a spin on the turntable before re-coupling to her train. Glancing at the station timetable we see that our Daily Mixed is now train #4, ready to depart for the trip back to Thunder Mesa.
Just then, another train appears, bell ringing loudly as it rounds the bend into San Lorenzo. This is train #3, the Excursion Special, pulled by a bright red and green Porter and towing a half dozen passenger-converted gondolas filled with happy tourists. They'll stop here for lunch as the Daily Mixed departs, then turn the locomotive for the return trip to Thunder Mesa. Meanwhile, high up at Big Thunder Camp, the morning ore train has completed its duties there and is now backing downgrade with a heavy load bound for Thunder Mesa Mill. Switching the mill will go on into the evening but all three trains will be back and ready for the next day by suppertime.
Construction of benchwork and sub-roadbed is already underway to put this new plan into action. I'm very happy with it. It does just about everything I want the layout to do in the space I have available. If I ever end up moving to a bigger location though, all bets are off and it will be back to the drawing board again!
Thanks for checking in, amigos. Question or comments are welcome below, or join the ongoing conversation on the
Thunder Mesa Facebook page. Adios for now!