|
Emerging from Rainbow Caverns.
|
February was a short month but I still managed to get a lot done out in Thunder Mesa country. Most of the work this month was on scenery and structures, but I've also started work on some special animation effects and a final "Grand Plan" for an expansion of the layout should time and resources allow.
Geyser Gulch
Just after leaving Thunder Mesa, trains pass beneath majestic McKennon Arch, gateway to the Living Desert, and into an active geo-thermal area known locally as Geyser Gulch. The Gulch is spanned by a rickety old wooden trestle and is home to bubbling pools, multi-hued hot springs and more than a couple erupting geysers - including "Old Unfaithful," most famous of them all.
 |
Hot Springs and erupting Geysers at the Magic Kingdom, Walt Disney World.
|
 |
Geyser Gulch under construction on the TMMC.
|
 |
Old Unfaithful. The terraced hot springs are built up with disks of foamcore, card-stock and paper. The edges will be finished with acrylic modeling paste to give them the look of built-up and eroded travertine. The rest of the Gulch is Sculptamold over carved foam.
|
Modeling the physical appearance of the geysers is relatively easy, the tricky part will be making them erupt on demand.
 |
The plan is to use Theatrical fog forced up through tubing and out the geyser tops when a magnetic reed switch or photocell is tripped by a passing train. Theatrical fog is made by heating glycol until it vaporizes. A great deal of fog can be made from a very small amount of glycol so the trick will be keeping the amount fog small enough to be convincing as a 1/4" scale geyser. Too much could easily overpower the entire layout.
|
 |
Copper tubbing has already been installed below the geyser cauldrons, ready to be connected to the fog system.
|
I know that a lot of trial and error will be required to get these geysers working effectively and I'm currently looking into building or buying a very small fog maker. Wish me luck!
Mock-Ups 2.0
Anyone who has followed my modeling knows that I am a big believer in using structure mock-ups to work out a scene. They are quick, easy and cheep to build and can really help answer important questions about proportions, spacing and color, especially in a group of buildings like a town. On top of that, a well built and attractive mock-up can "hold the place" for a more elaborate and delicate finished model as scenery, lighting and other details are worked in. My first round of mock-ups on the TMMC were pretty basic, just white foamcore boxes really. But as I create plans for my structures, all of which will be scratch built, I've gotten in the habit of cutting and pasting those plans together into full sized, dimensional paper models. To date, I've replaced all of my earlier plain white mock-ups with these paper models.
 |
The town of Thunder Mesa. All structures are paper model mock-ups that act as both plans and place-holders for more detailed, scratch built structures yet to be built. Using these mock-ups has allowed me (and you) to see what my completed town will look now, rather than months from now when all of the final structures are built. Note that the scenery in this area is still just painted styrofoam at this point
|
I design my structures in Adobe Illustrator, a wonderfully versatile vector graphics program, and use photos from the parks and educated guesses for most of the dimensions. My goal has never been to make exact copies of the Disneyland structures, but rather to capture the look and feel of them in a way that works for my layout. Here is a sampling of the plans I've created for Thunder Mesa, most are based on Disneyland structures that currently exist on the Big Thunder Mt RR, or used to exist in the little mining town of Rainbow Ridge.
 |
El Dorado Hotel and Barber Shop.
|
 |
Miner's Hardware.
|
 |
Marshal Bound's Office. This one is from Rainbow Ridge and no longer exists at Disneyland.
|
 |
Paper model mock-ups on the layout.
|
 |
Panhandle Hotel.
|
 |
Thunder Mesa Gazette. This is the Big Thunder Epitaph at Disneyland.
|
 |
Cordelia's Cafe. This one isn't at Disneyland. It is a freelanced design and my homage to Cordelia Knott's wonderful chicken dinners and Boysenberry pies.
|
 |
Paper models on the layout.
|
 |
Gold Nugget Dance Hall.
|
 |
Assay Office.
|
 |
Big Thunder Saloon.
|
 |
Dance Hall, Assay and Saloon as paper models.
|
 |
General Mercantile.
|
 |
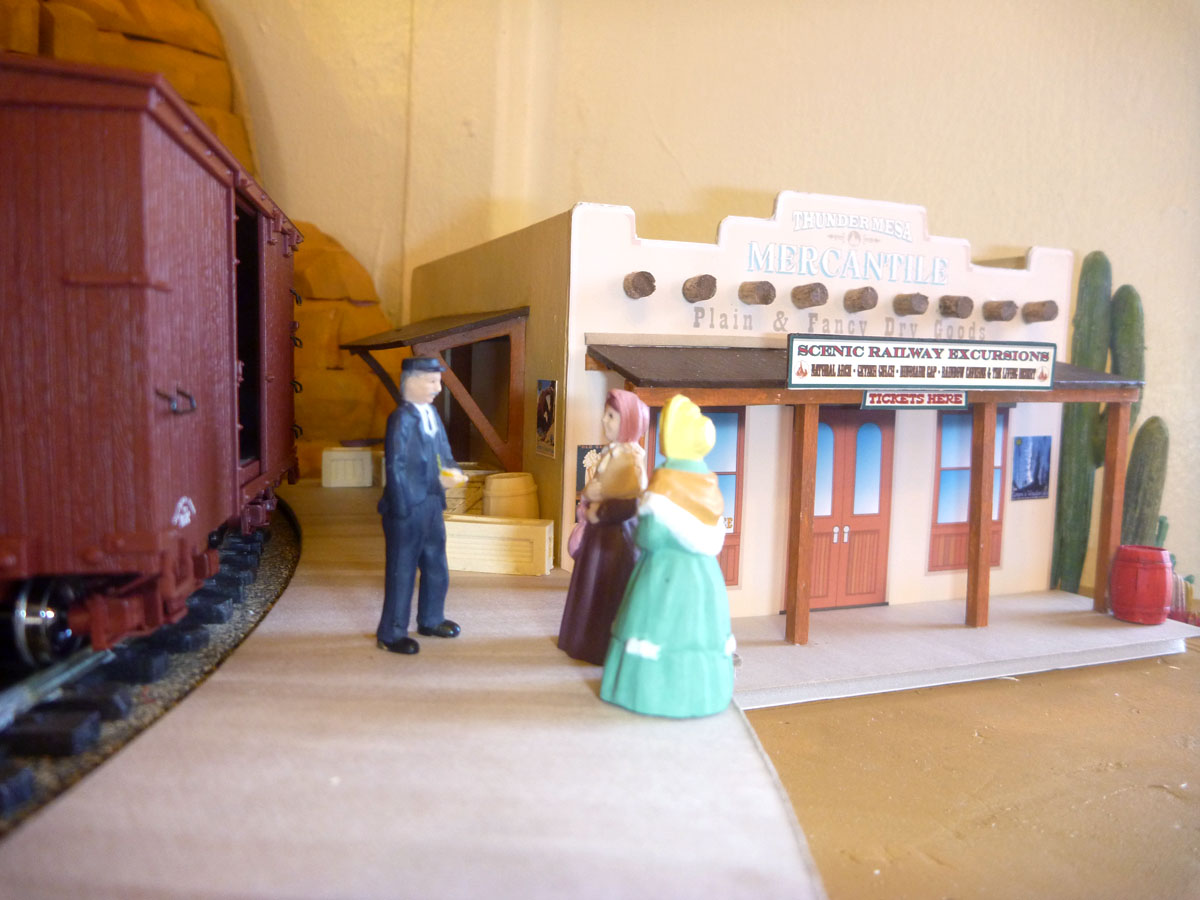
The General Mercantile sits trackside on the layout with its own curving platform. It doubles as the town Post Office, and as train station for guests taking scenic rail excursions aboard the Thunder Mesa Line.
|
 |
Another view of the Mercantile paper model. Colorful posters advertise the amazing scenic wonders along the line in "Nature's Wonderland."
|
Big Thunder Mill
Those familiar with Disneyland's Big Thunder Mountain Railroad might wonder why I'm not using the big, iconic ore mill/mine building to load passengers. Well, because in my world, that big building is still used for mining.
 |
Unlike the Disneyland structure, most of the lower portion of my Big Thunder Mill is enclosed. The large freight doors are used for loading bags of ore concentrates into boxcars. The cut-away in the platform is the ore dump where side dump ore cars drop raw ore from the mines into an underground hopper. Were this a real mill, a conveyer would move the ore to the top floor of the mill where it would be fed into the stamps for crushing and sorting.
|
 |
The ore dump. This is a pretty small mill so only one car at a time can dump its ore. The dump goes straight through to below the layout where loose ore can be collected in a container, then returned to the mines and load the cars all over again.
|
 |
One of the side dump cars. In operation, music wire will come up through the small tube between the ties and tip the cars. The wire will be attached to a Tortoise switch machine activated from the control panel. It takes a steady hand on the throttle to line up each car at the dump!
|
 |
Another view of the mill. The open loading dock at right is for incoming supplies, parts, coal, etc.
|
 |
A Thunder Mesa train prepares to head out after dumping its ore cars at the mill. Another train will bring boxcars to be loaded with ore concentrates bound for the Santa Fe and Carolwood interchange. On the left is old abandoned Shaft #1. Some folks say it's haunted.
|
Engine Shed
 |
Mock-up for an open-air engine shed.
|
Why on Earth would a little town like Thunder Mesa need an engine shed? Why, for the mill switcher of course. But, why would they need a mill switcher? Couldn't the local trains just switch the mill as they came through town? Well, yes, they could, if there was a runaround track. But there isn't, so trains traveling in one direction can switch the mill but trains traveling in the other direction can't. The solution? A mill switcher.
There is a switchback siding in Thunder Mesa and, almost from the beginning, I had though that it would be a good place for
a funky old engine shed and service area. Then, for while I thought it would be a lousy place for one and decided to put some stock pens there instead. Turns out it was even a lousier place for stock pens than it was for an engine shed and I was back to square one again.
Then, as I began to think about how my little empire might actually operate I realized that an engine shed and service area would be just the thing for that spot. It also fits into my larger "Grand Plan" for expanding the layout, but I'll go into that in depth in a later update.
 |
The engine service area is right next to McKennon Arch.
|
 |
The layout as it looks today. I got so tired of looking at pink styrofoam that I went ahead and painted almost everything with my scenery base color. Much better.
|
That about wraps it up for this month. I've been working on the railroad pretty steadily lately and new updates might be coming down the track a little more frequently in the future. Stay tuned!
Update 9/7/13:
A few things have changed since this original posting. The layout has expanded, the engine shed has been removed from this area, and the Mercantile has moved to the top of the mesa and no longer functions as the depot. Most importantly, all structure plans are now available online as downloadable PDF files. Click the Plans & Graphics tab at the top of the page to download.